
Delivered across Gauteng
Johannesburg, Pretoria, Centurion, Midrand and the East and West Rand. Delivery is quoted per order, so you only pay what it costs to reach you.
Gauteng delivery
We deliver to homes and businesses across Gauteng.
Quoted on your invoice
Prices include VAT but exclude delivery. Give us your address on the order form and the delivery cost appears on your invoice before you pay.
Dispatched on payment
Your order is confirmed and dispatched once payment is received. We will let you know the expected delivery date.
What installation do I need?
H2oh! supplies the products and does not carry out installations. Here is what each product needs.
| Product | Installation needed | Who does it |
|---|---|---|
| Top and bottom loading water dispensers | None. Place on a hard, level surface, fit a water bottle and plug in. A floor-fixing bracket kit is included to prevent tipping. | You |
| Ultrafiltration purifier (HUF21M-IT-SA) | Connects to the cold-water line under the sink or on the counter. No power or drain needed. | Accredited installer or qualified plumber |
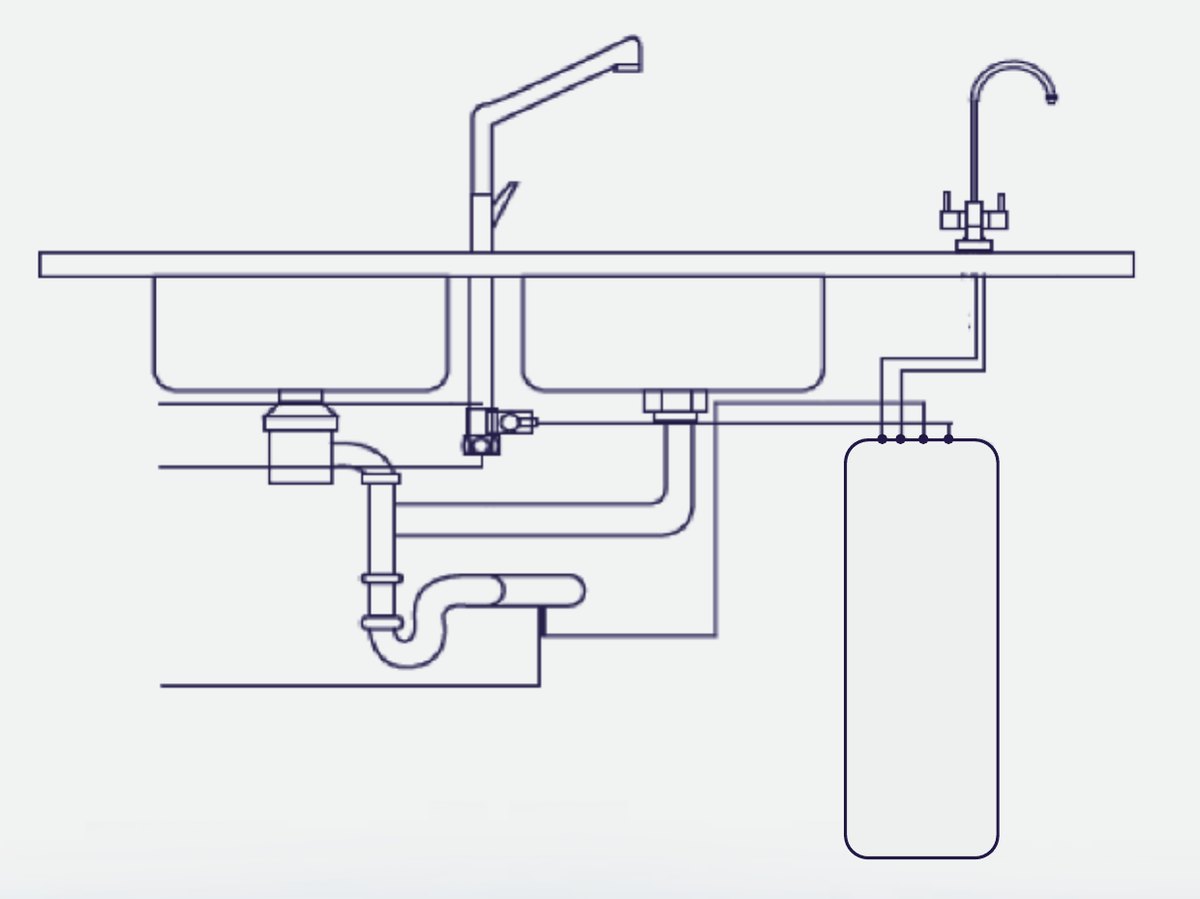
| Reverse osmosis purifiers (HRO75SAC1-SA, HKC1560-R683U1-SA) | Under-sink connection to the cold-water line and drain, a dedicated faucet, and a 230V power point. | Accredited installer or qualified plumber |
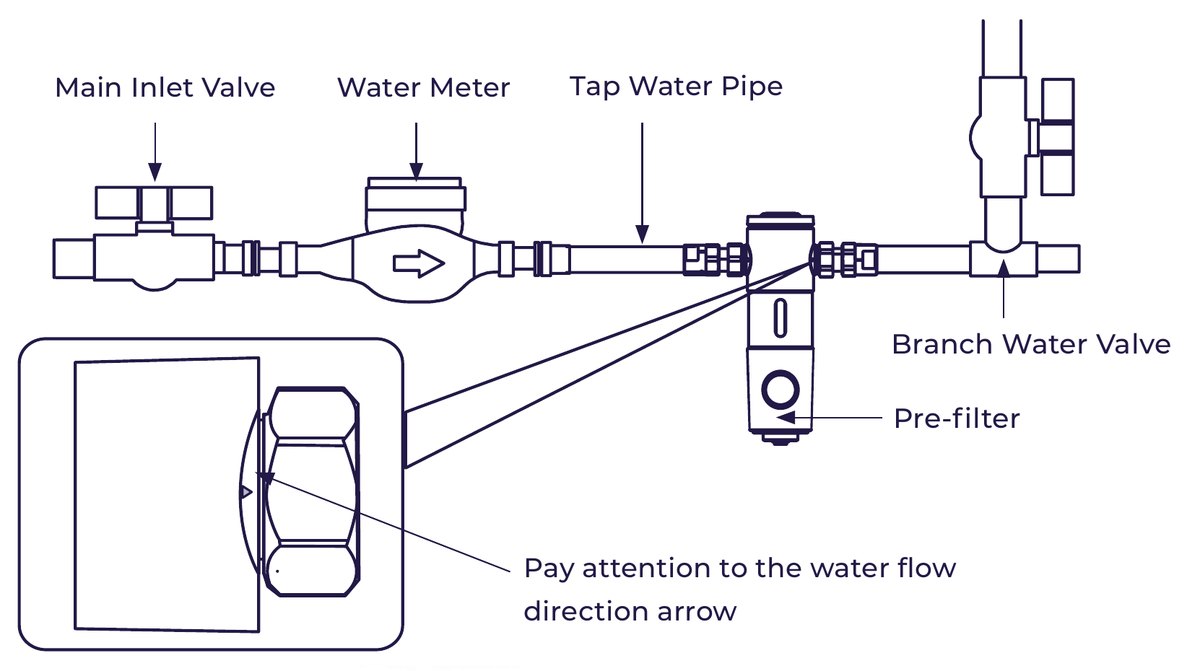
| Pre-filters (HP-05-SA, HP-45-SA) | Fitted on the main water line after the meter, with at least 300mm of drain space below. | Accredited installer or qualified plumber |
Need an installer?
Tick “Send me accredited installer details” on the order form and we will put you in touch with an accredited installer. You are also welcome to use your own qualified plumber.
Installation and your warranty
Kwikot's warranty requires products to be installed, used and maintained according to Kwikot's specifications. Kwikot does not warrant installation work, so installation claims go to the installer who did the job. Read the warranty terms.
Installation diagrams
The manufacturer's diagrams for every product we sell. Share the relevant one with your installer or plumber before they arrive.
Top loading water dispensers
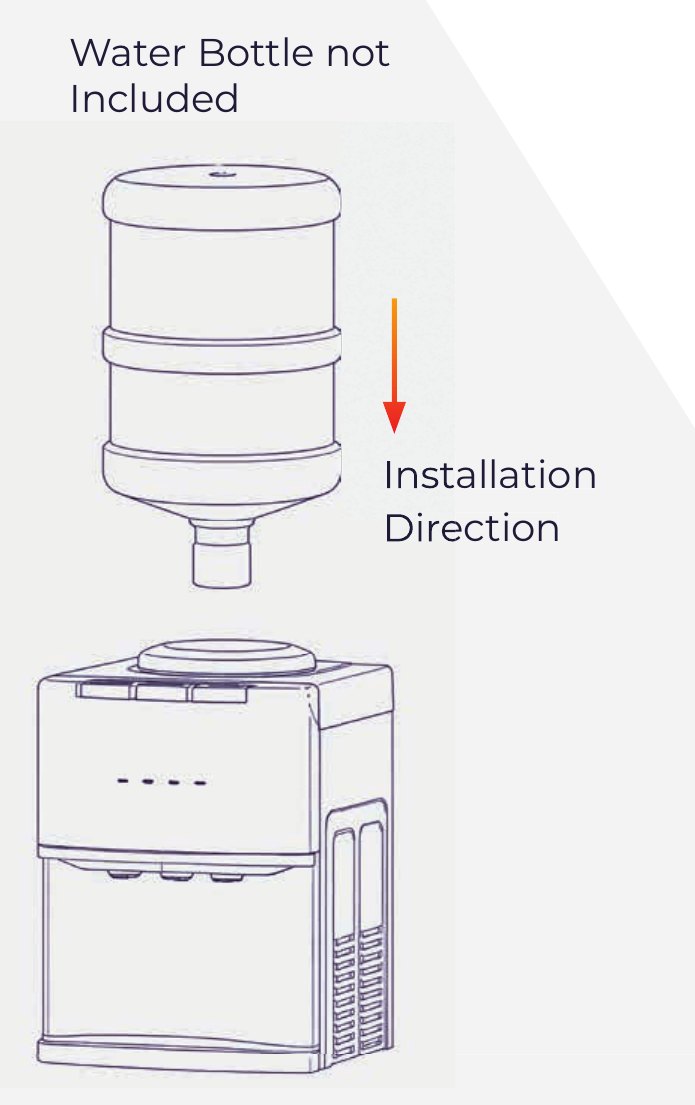
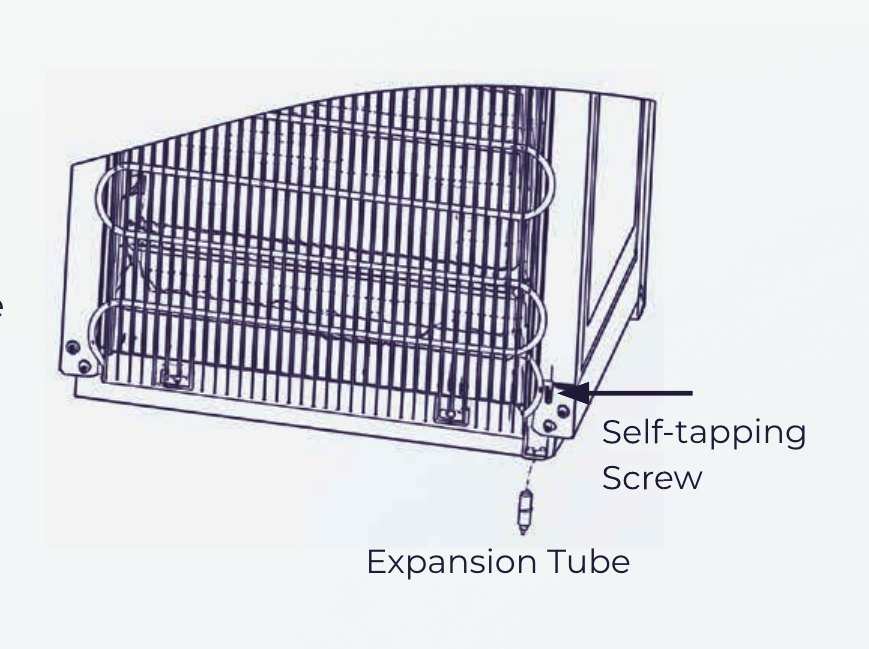
Bottom loading water dispensers
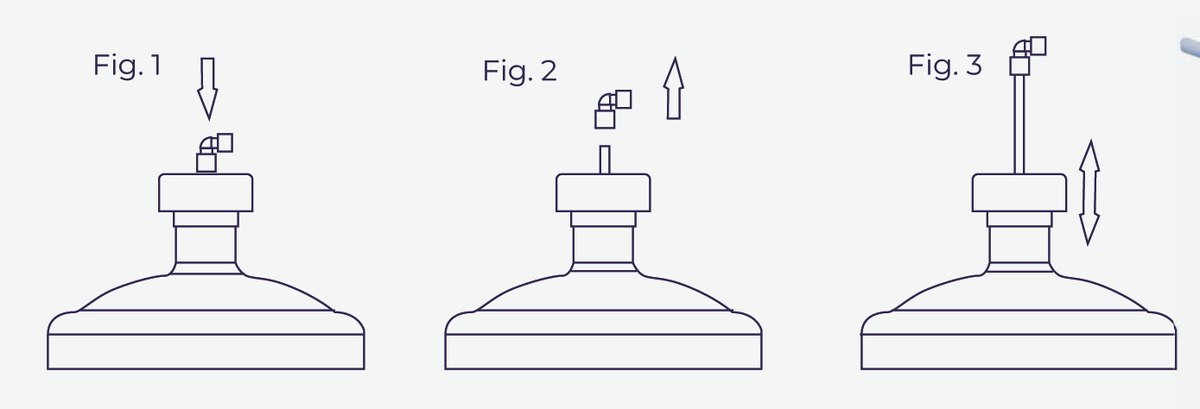
Ultrafiltration purifier
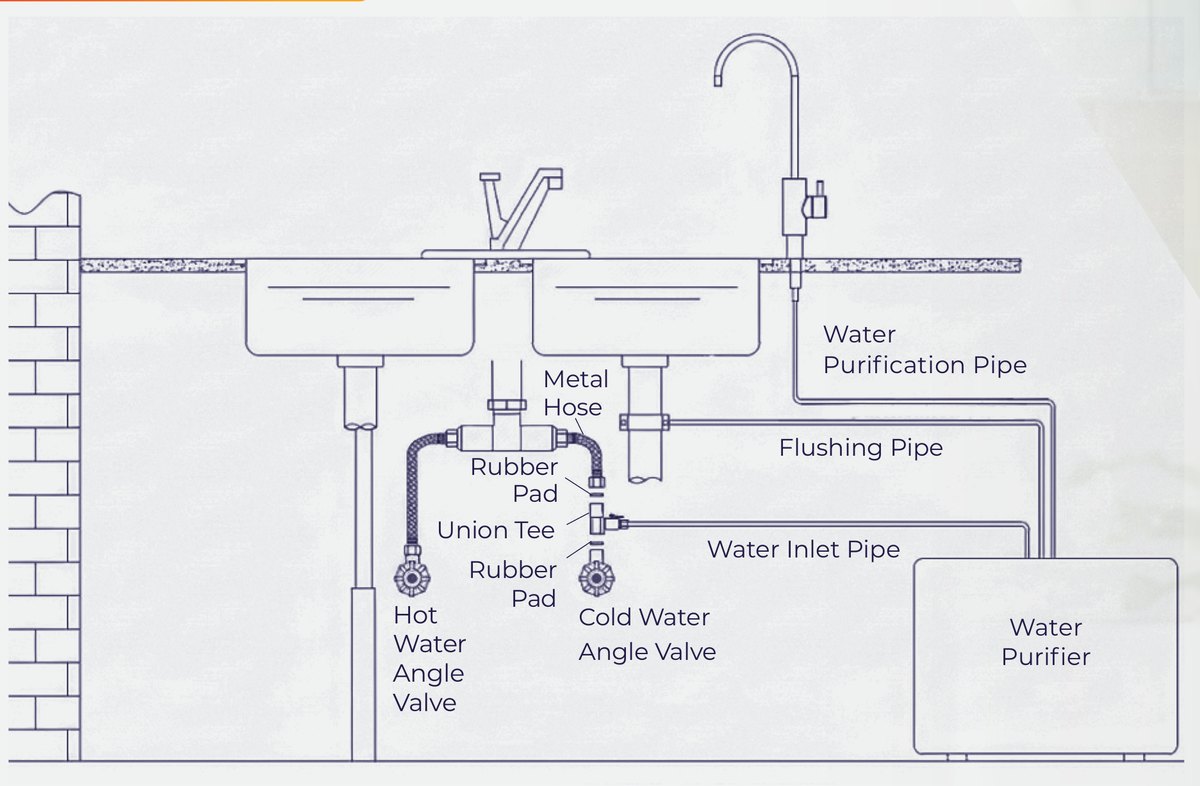
Reverse osmosis purifier with pressure tank
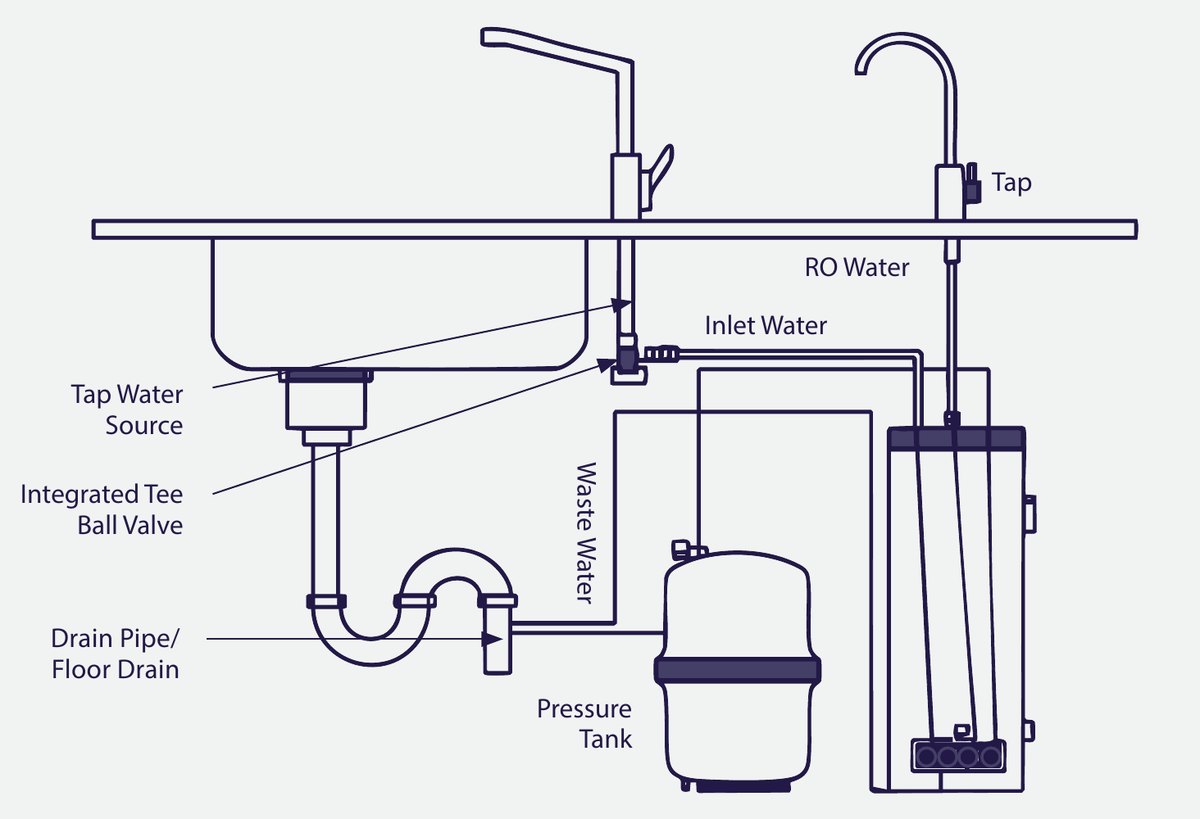
Tankless reverse osmosis purifier
Pre-filters, manual and automatic
Wall or counter-top RO with hot water (arriving Q1 2027)
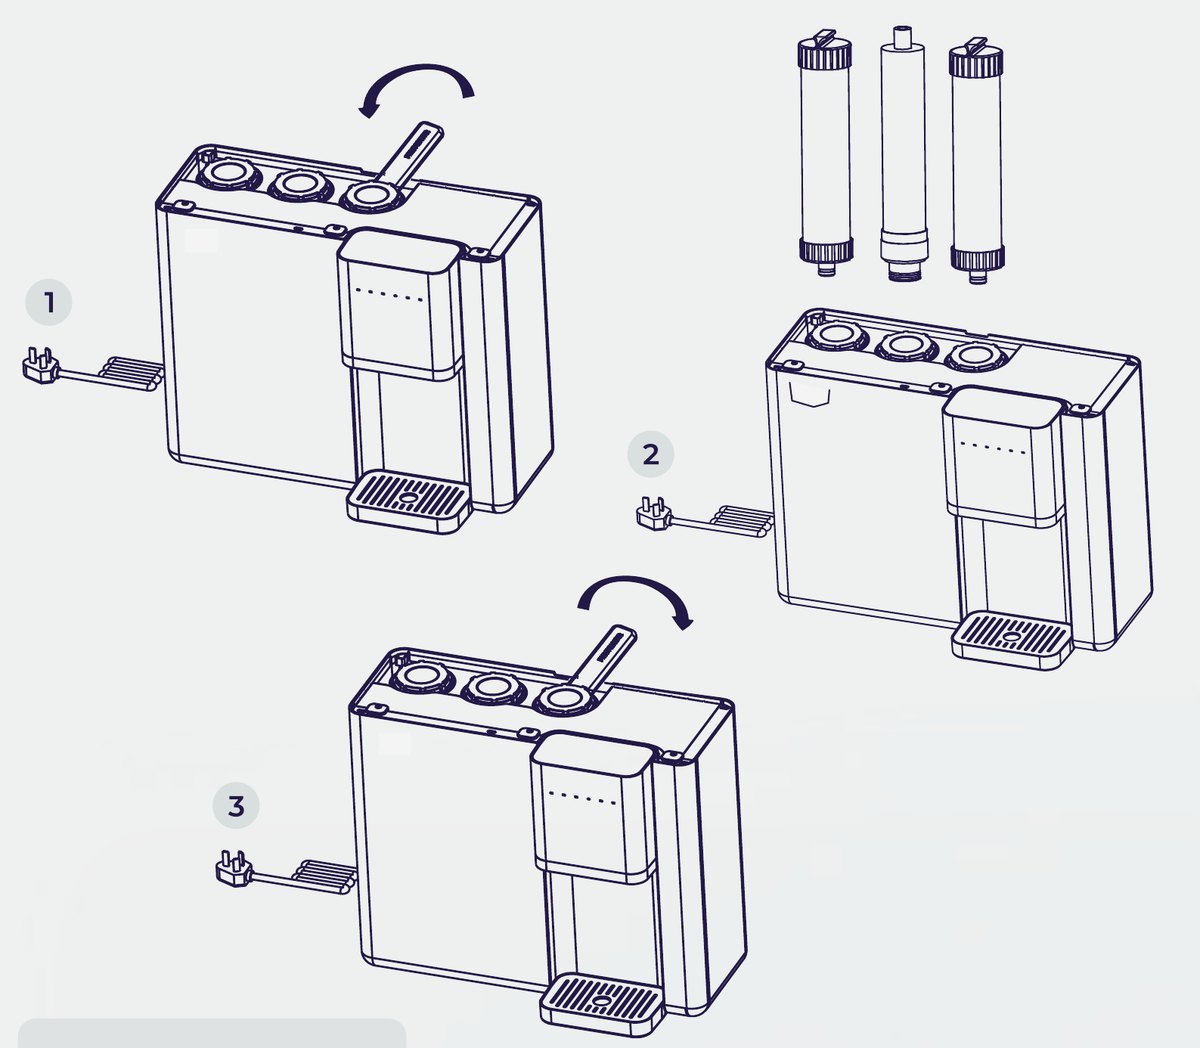
Counter-top RO, hot and cold (arriving Q1 2027)
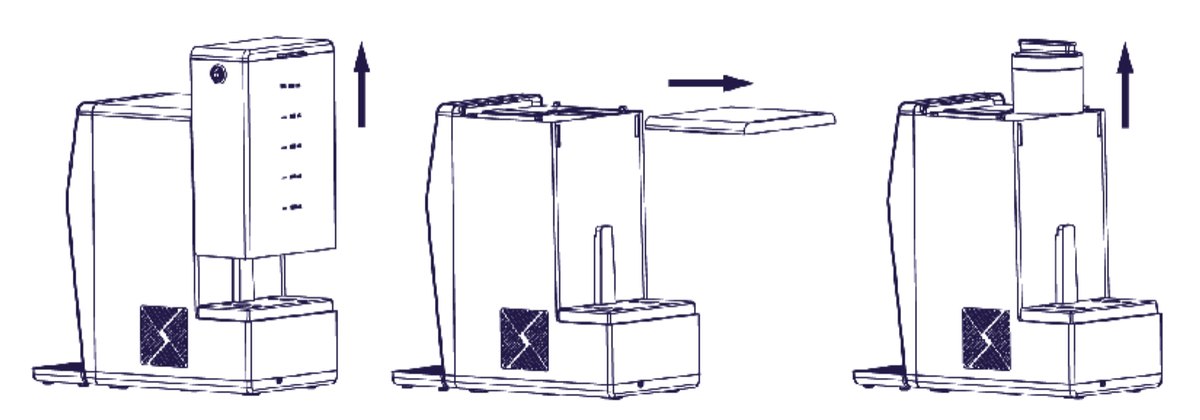
Dispenser set-up tips from the manufacturer: stand the unit upright for at least 2 hours before switching on; keep 15cm clear at the back and 5cm at each side; check the drain cap is tight before first use; and flush the unit with drinking water before you start using it.
Ordering is simple
No account and no card details on the website.
Choose your products
Add dispensers or purifiers to the order form and tell us where to deliver.
Receive your invoice
We email an invoice with VAT and the delivery cost to your address clearly shown.
Pay and we deliver
Once payment is received, we deliver to your door in Gauteng.
Ready when you are
Tell us what you need and where it is going. We reply with an invoice that includes your delivery quote.
Prefer to talk? Phone or WhatsApp 071 193 8839.